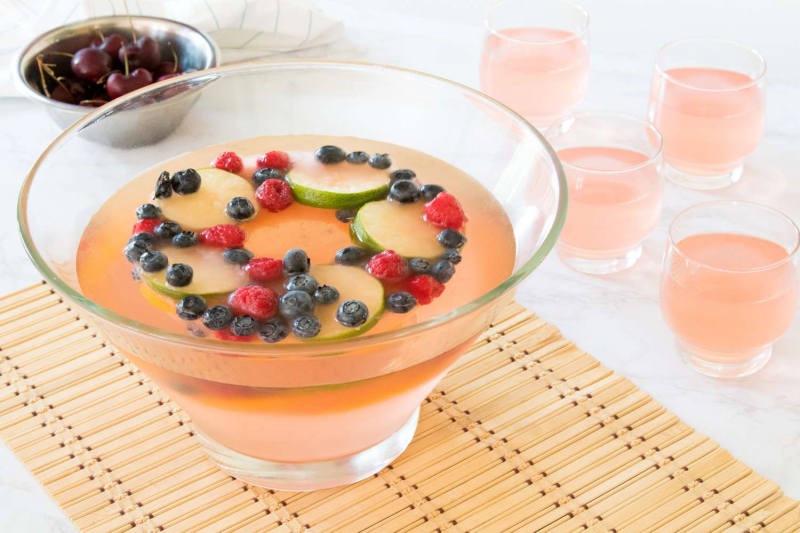
Decorate Your Party Punch With a Fruity Ice Ring
A quick way to add pizzazz to your next punch bowl is to create a fruit-filled ice ring. It's an easy project that not only adds beauty to the presentation, but it can also enhance the flavor of the punch.
Choosing the Mold
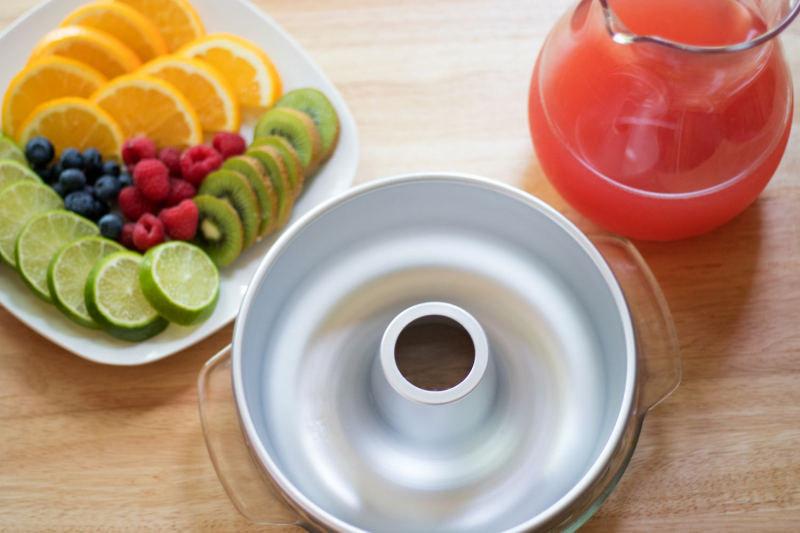
Nearly any empty vessel can be used as an ice mold and you can buy all sorts of fancy molds in various shapes and sizes. One of the easiest, least expensive, and most readily available options is the simple ring pan.
Ring pans are used to bake round cakes. While you can use other small baking pans, these are a natural fit for the round shape of a punch bowl. The metal surface easily releases the ice once it’s frozen and the center cone creates a hollow center that looks stunning in a punch.
Traditionally shaped bundt pans work as well, they simply have a more elaborate shape than a flat ring. That’s great for making decorative coffee cakes and you can invert your ice ring in the same way. Just remember to load the pan so the top of the ice is in the bottom of the pan.
The size of the mold matters because you want it to fit inside your punch bowl. A mold with a seven-inch diameter will fit in the average punch bowl. Try to avoid anything over 9 inches unless you have a really large bowl.
Filling the Mold
Be creative with the types of fruits you add to the punch bowl. Think of things that complement the punch recipe you’re using or simply pick up a variety of fruits that you see at the market. It’s hard to go wrong, especially if you have a punch that’s already a blend of fruits. While the fruit will infuse subtle flavors into the punch, it’s not going to affect it significantly.
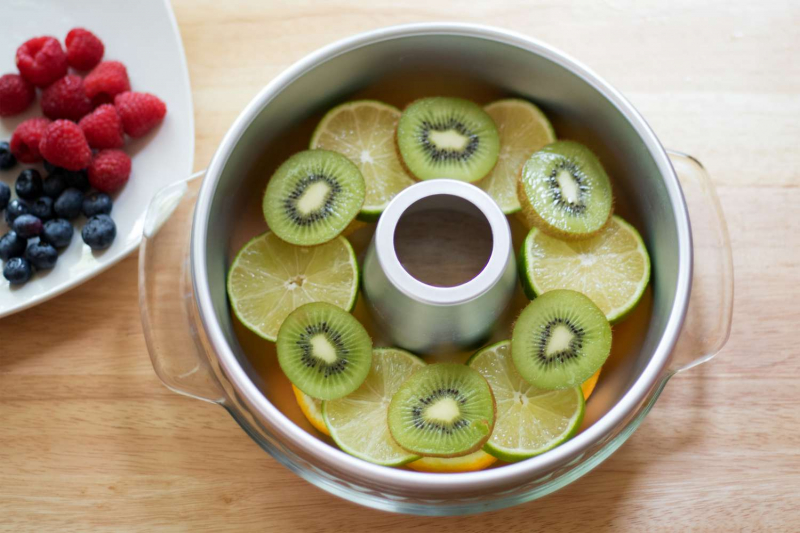
To form a good base that’s universal to nearly any punch, pick up some citrus fruits like lemons, limes, and oranges. Slice them into wheels, then layer them in the mold. Depending on the size of the mold, you might have to cut larger fruits like oranges in half.
- Add slices of other fruits like kiwi or pineapple for a little extra color and texture.
- Avoid pitted fruits like peaches unless you cut them into fancy chunks. A melon baller can help shape fruits as well.
- Berries are fun fruits to add to the top of the mold. They’ll poke out through the ice and give the ring texture and color.
- Add herbs if your punch includes an herbal ingredient. Small sprigs are good and individual leaves or buds work but might end up floating around in the punch as the ice melts.
- For seasonal punches, add appropriate fruits and maybe some spices. Apples and cinnamon sticks can work with an apple cider-based punch, while cranberries and pomegranate arils add a festive flair to holiday punches against a base of oranges or pears.
Tip
Fill your mold between one-half and three-quarters with fruit, leaving a good amount of space between the top layer and the rim. Adding the liquid will cause some of the ingredients to float (especially berries) and you want enough liquid to form a good block of ice.
Blending the Liquid
Typically, ice is made of water alone and that is a good option for an ice ring. However, as it melts, you also run the risk of watered-down punch. To offset that, create a blend of water and fruit juice to freeze.
Choose a fruit juice (or juice blend) that is included in the recipe or one that complements your punch. For instance, peach juice is a perfect choice for this white peach sangria recipe and cranberry juice is perfect for the sparkling cranberry punch. Mix that juice in equal parts with water and pour it into your fruit-filled mold. As the ice melts, the diluted liquid will have more flavor.
Do not add alcohol to the ice mold. Liquor will not freeze at certain concentrations and even wine and beer have a higher freezing point than water and juice. Even if it does successfully freeze, it will melt much faster, possibly before the party’s over.
Fill the mold with at least 1/2-inch of space at the top to leave room for expansion as the ice freezes.
Freezing the Ice Ring
With a metal ring, it's best to give it a solid surface to rest on while freezing. Even if you're very careful, when you remove the mold from the freezer, the slightest twist of the metal can cause the ice to crack (it likely won't break into pieces, but won't be as pretty). A shallow glass dish that's freezer-safe, such as a pie pan, solves this problem. It will also capture any spills that may occur while you transfer the mold to the freezer.
Create a solid, level surface in your freezer to set the ice ring. Shift some frozen foods around if needed, then set it down and double-check that the liquid is level before closing the freezer. When using the freezer on your refrigerator, try to avoid opening the door for at least a couple hours so you don't jiggle things around.
The average ice-ring should freeze solid in six hours. The larger the mold, the more time you need to allow for a solid block of ice. Overnight is always a safe bet.
Preparing the Punch
Removing the ice from the mold is easy. Place the mold in a large bowl of cold water (warm water can cause cracking) for a few minutes. Then invert it into the dish the mold was sitting in while freezing. If it doesn't release right away, leave it. You should hear it drop within a few minutes.
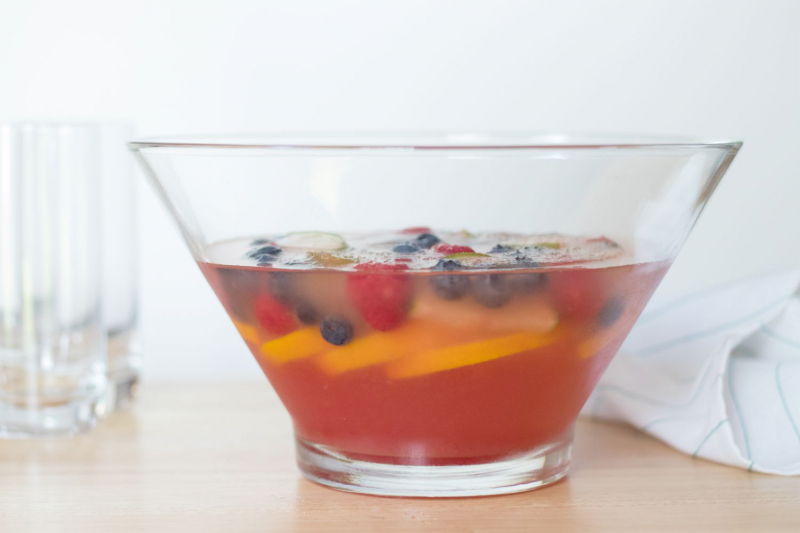
Place your ice ring into the punch bowl and fill it with the chilled punch (the ring will not melt as quickly if the punch is cold). On average, the ice ring will stay solid for three to four hours, depending on its size and the room's temperature. As it melts, some of the fruit will release and float around, which only adds to the aesthetics.